Saturday, May 14, 2011

Create a Digital Camera With Wooden Accents Using Photoshop

As designers, we occasionally need digital versions of electronic devices to use in our designs. All to often however, we find that the device we need doesn’t actually exist in the format that we need. In times like those, having experience building realistic-looking electronic devices in Photoshop can be a real life-saver. In this tutorial we will learn how to draw a digital camera using Photoshop.


Step 1

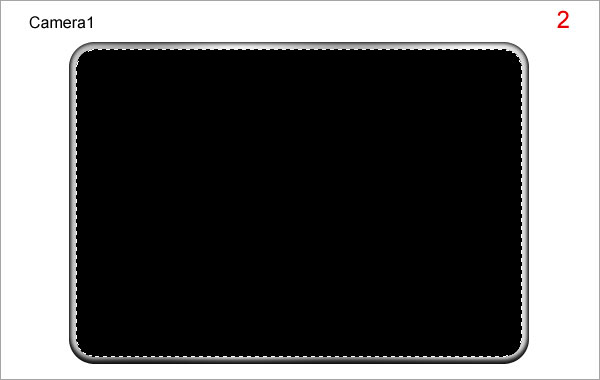
In new document, create a new layer, call it “camera1”. Use Rounded Rectangle Tool (set Radius: 20px) to draw a shape like (1a) and fill it any color (1b). Then open Blending Options and setting (1c).

Step 2

Create new layer on top, call it “camera2”. While holding “Ctrl” down click on “camera1” to obtain its selection. Go to menu Select > Modify > Contract, set Contract By: 7px. Then fill it any color.

Step 3

Press Ctrl + T, right click on the image and choose Perspective. Then while holding “Alt” down change “camera2” like (3a).
Use Rectangular Marquee Tool to make the like (3b) and press Delete (3c). Then open Blending Options and use settings described in (3d).

Step 4

Press Ctrl + J to duplicate “camera2”, rename new layer “camera3”. Delete its Blending Options and reduce Fill to 0%. Then open Blending Options and use setting described in (4a).

Step 5

Use Rectangle Marquee Tool to delete the following below.

Step 6

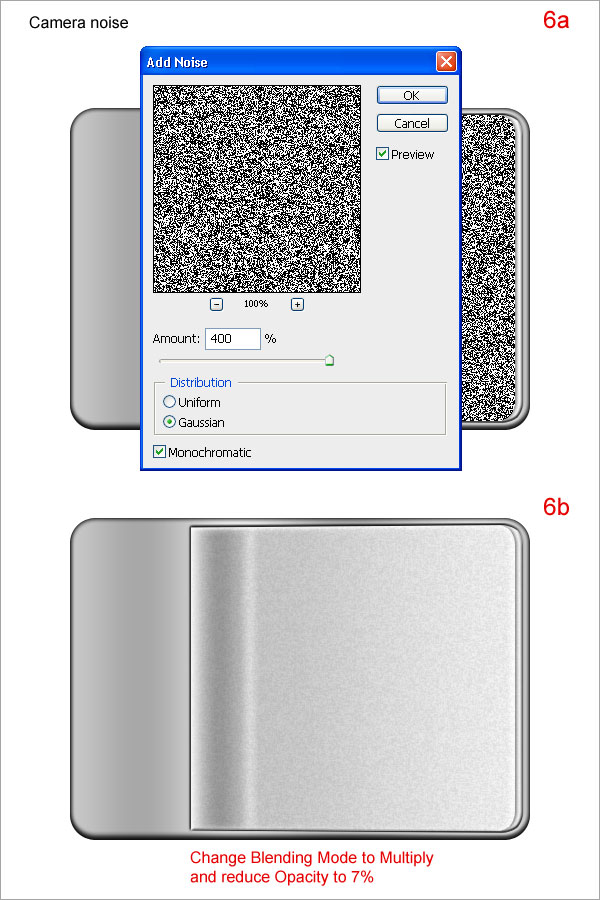
Press Ctrl + J to duplicate “camera3”, rename new layer “camera3 noise”. Reduce its Fill to 100% and delete its Blending Option. While holding “Ctrl” down click on “camera3” to obtain its selection. Go to menu Filter > Noise > Add Noise, set like (6a). Then go to menu Filter > Blur > Blur. Change the layer Blending Mode to Multiply and reduce Opacity to 7% (6b).

Step 7

Create new layer on top of “camera1”, call it “camera right”. Move it left like (7a). Repeat step 2. Then make the selection like (7b) and press Delete.
Press Ctrl + T, right click on the image and choose Perspective. While holding “Alt” down change “camera2” like (7c). Then open Blending Options and use settings described in (7d).

Step 8

Press Ctrl + J to duplicate “camera right”, rename new layer “camera right shadow”. Move it under “camera right” in Layer tab (8a). Delete its Blending Options and delete like (8b). Then open its Blending Options and use setting described in (8c).

Step 9

Add “wood texture” and change its Blending Mode to Multiply.

Step 10

The right earpiece. Create new layer on top of “wood texture”, call it “right bottom”. Use Rounded Rectangle Tool (set Radius: 20px) to draw like (10a) and fill it any color (10b). Then while holding “Ctrl” down click on “wood texture” to obtain its selection. Press Ctrl + Shift + I to reverse this selection and press Delete (10c). Open Blending Options and use settings described in (10d).

Step 11

Press Ctrl + J to duplicate “right bottom”, rename new layer “right bottom noise” and delete its Blending Options. While holding “Ctrl” down click on “right bottom noise” to obtain its selection. Go to menu Filter > Noise > Add Noise, set like (6a). Then go to menu Filter > Blur > Blur. Change the layer Blending Mode to Multiply and reduce Opacity to 20%.

Step 12

Add more light and shadow for the camera.

Step 13

Create new layer on top, call it “zoom1”. Use Elliptical Marquee Tool to draw the circle like (13a) and fill it any color. Then open Blending Options and setting (13b).

Step 14

Create new layer on top, call it “zoom2” and draw the circle like (14a). Then open Blending Options and use settings described in (14b).

Step 15

Create new layer on top, call it “zoom3” and draw the circle like (15a). Then open Blending Options and use settings described in (15b).

Step 16

Create new layer on top, call it “zoom4” and draw the circle like (16a). Then open Blending Options and use settings described in (16b).

Step 17

Create new layer on top, call it “zoom5” and draw the circle like (17a). Then open Blending Options and use settings described in (17b).

Step 18

Create new layer on top, call it “rounded zoom”. Use Rounded Rectangle Tool (set Radius: 20px) to draw like (18a). Then open Blending Options and use settings described in (18b).

Step 19

Make “zoom light1” and “zoom light2” to the following below.

Step 20

Add text to the zoom.

Step 21

Create new document on top, call it “flash1”. Use Rounded Rectangle Tool (set Radius: 5px) to draw to the following below.

Step 22

Create new layer on top of “flash1”, call it “flash2”. While holding “Ctrl” down click on “flash1” to obtain its selection. Go to menu Select > Modify > Contract, set Contract By: 5px and fill any color for “flash2”. Then open Blending Options and use the below settings.

Step 23

Press Ctrl + J to duplicate “flash2”, rename new layer “flash3” and reset its Blending Options like below.

Step 24

Add some black dots.

Step 25

Create new layer on top; call it “black bar”. Use Rounded Rectangle Tool (set Radius: 4px) to draw like below.

Step 26

Press Ctrl + J to duplicate “black bar”, rename new layer “light bar”. Delete its Blending Options and fill white color. Then use Rectangular Marquee Tool to delete like below.

Step 27

Create new layer on top, call it “button”. Use Rounded Rectangle Tool (set Radius: 5px) to draw like below.

Step 28

Add 2 small lines.

Step 29

Create new layer under “camera1”, call it “camera shadow”. Use Eliptical Marquee Tool to make the selection like (29a), fill it black color (29b). Then go to menu Filter > Blur > Gaussian Blur and set like (29c).

Final Image

Creating electronic devices in Photoshop can be a tedious process. Your results will depend on the amount of time you dedicate to the project and the amount of detail that you decide to include. With practice you should be able to replicate just about any type of device on your own.

No comments:

Post a Comment